Bambu Lab A1, Bambu Studio
Using modifiers in Bambu Studio to change part of a print
You need one area of a print stronger, or one area a different color, or one area textured enough to grip. The instinct is to change the setting, and the setting changes the whole model. A modifier is a shape you drop onto the object; wherever the shape overlaps the mesh, the modifier's settings win and everywhere else is untouched. It is one right click and it is the cheapest way to stop paying for strength you do not need.
Steps
Slice once before you change anything
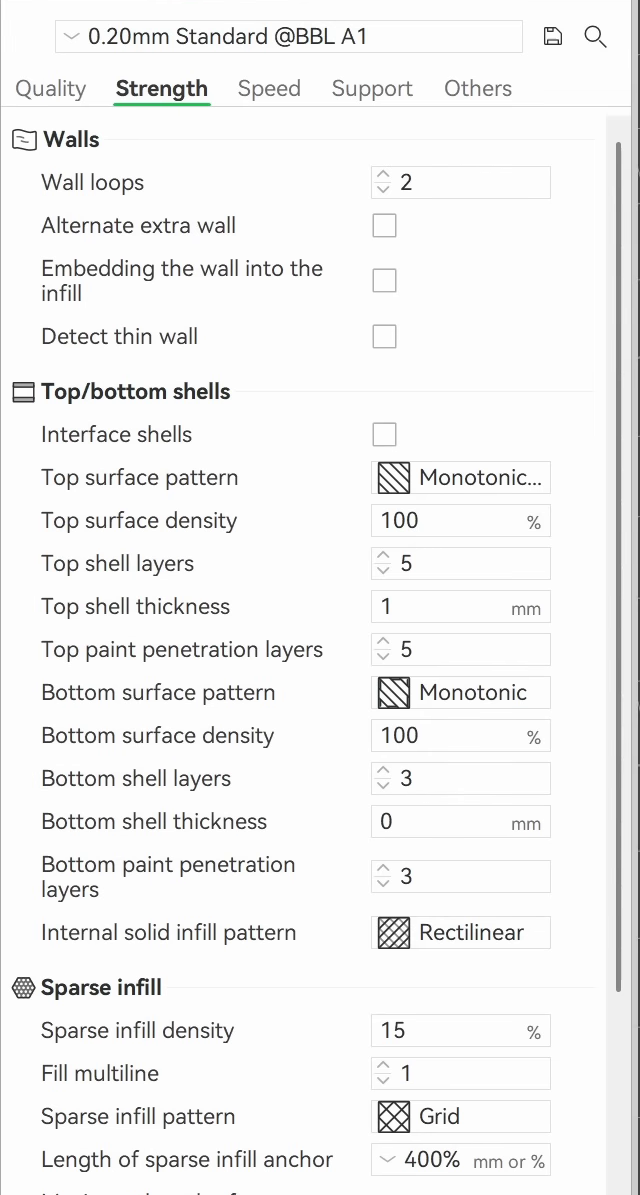
Put a simple shape on the plate and slice it as it comes. This one is a cylinder about 43mm across and 88mm tall on an A1 with a 0.4mm nozzle, on 0.20mm Standard: wall loops 2, sparse infill 15% grid. It slices to 49m20s of printing and 36.49g of filament. That number is the only thing that lets you judge anything you do next, and it takes ten seconds to get.
Change it globally once, to see the bill
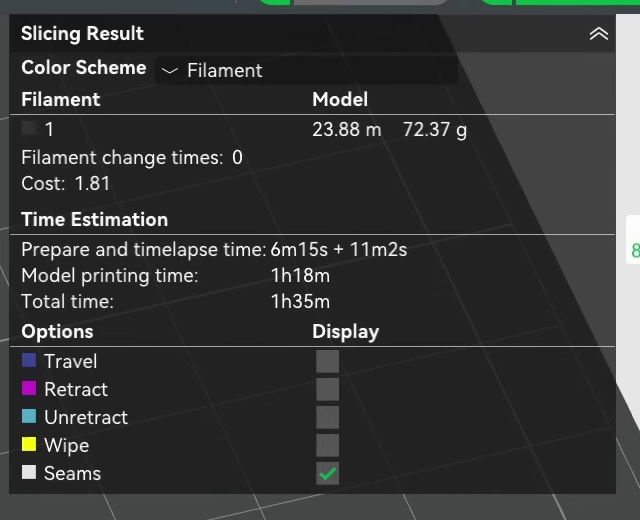
Now do it the obvious way. Wall loops to 4, sparse infill to 35%, slice again: 1h18m of printing against 49m20s, and 72.37g against 36.49g. So the whole-model version of this change costs an extra 29 minutes and very nearly doubles the filament. Worth doing once so the rest of the page is arguing against a number rather than against a feeling. Then reset both values before you carry on.
Add a modifier
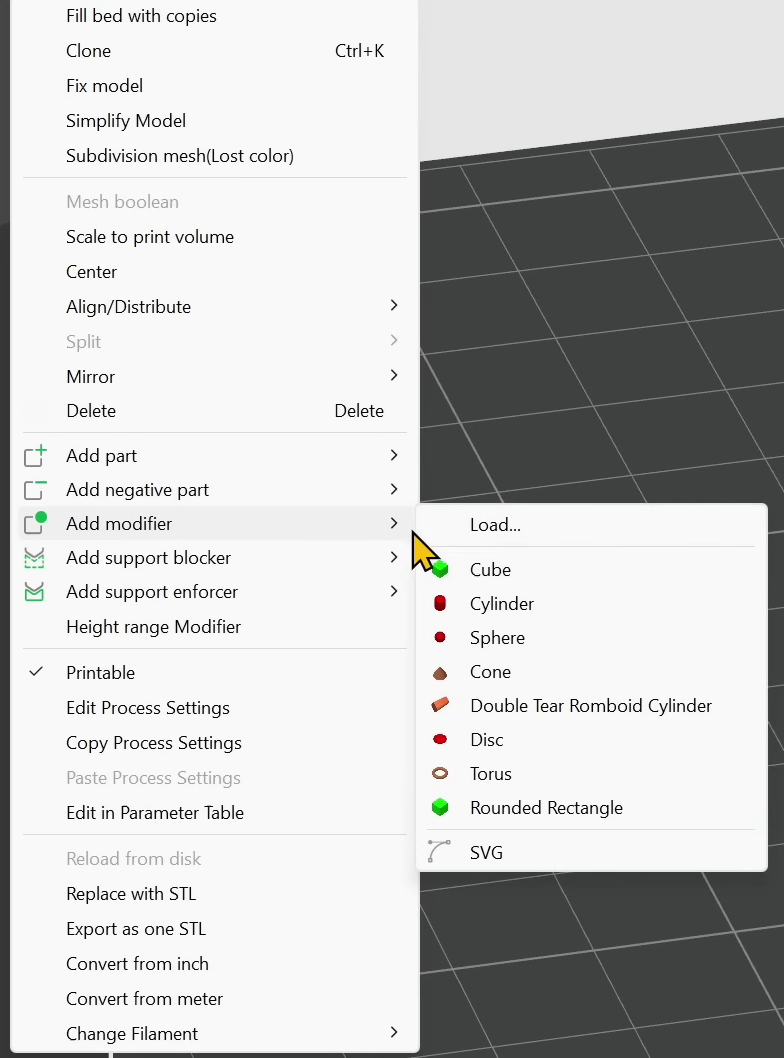
Right click the object, then Add modifier, then pick a shape. You get cube, cylinder, sphere, cone, disc, torus and rounded rectangle, plus Load to bring in your own model and SVG to bring in a flat outline, which matters more than it looks and comes back in step 6. Bambu Studio then shows a notice saying that to change the modifier's settings you have to select the modifier in the object list. That notice is the single most important sentence in this feature and it is easy to dismiss without reading. Note what else is on that menu while you are there: Add part, Add negative part, Add support blocker, Add support enforcer, and Height range Modifier. A negative part removes material and a modifier changes settings, so if you want a hole you are on the wrong menu item.
Put it where you want the change, then set its properties
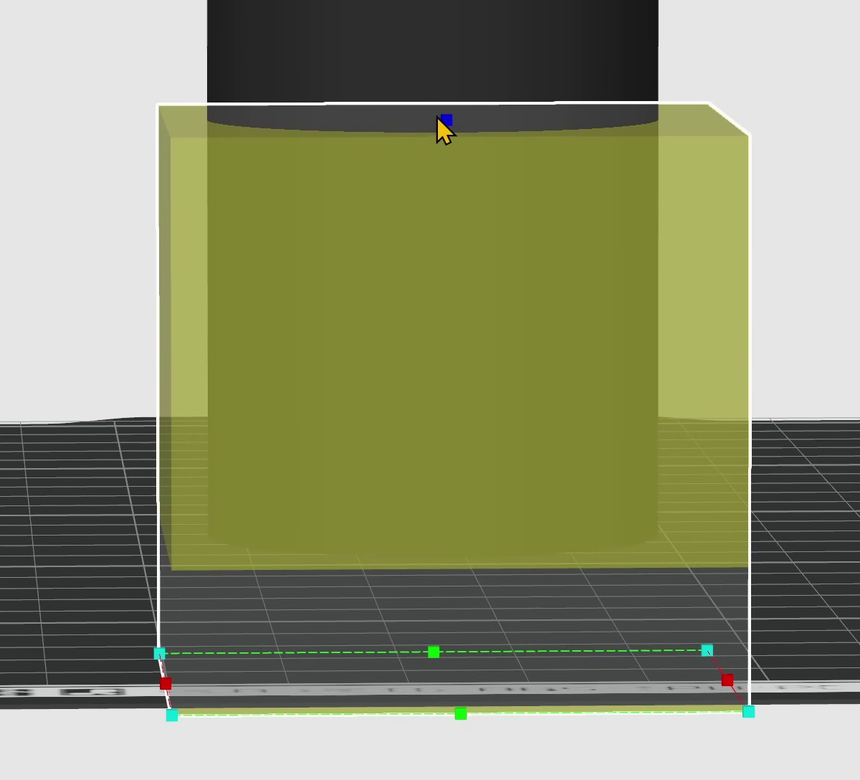
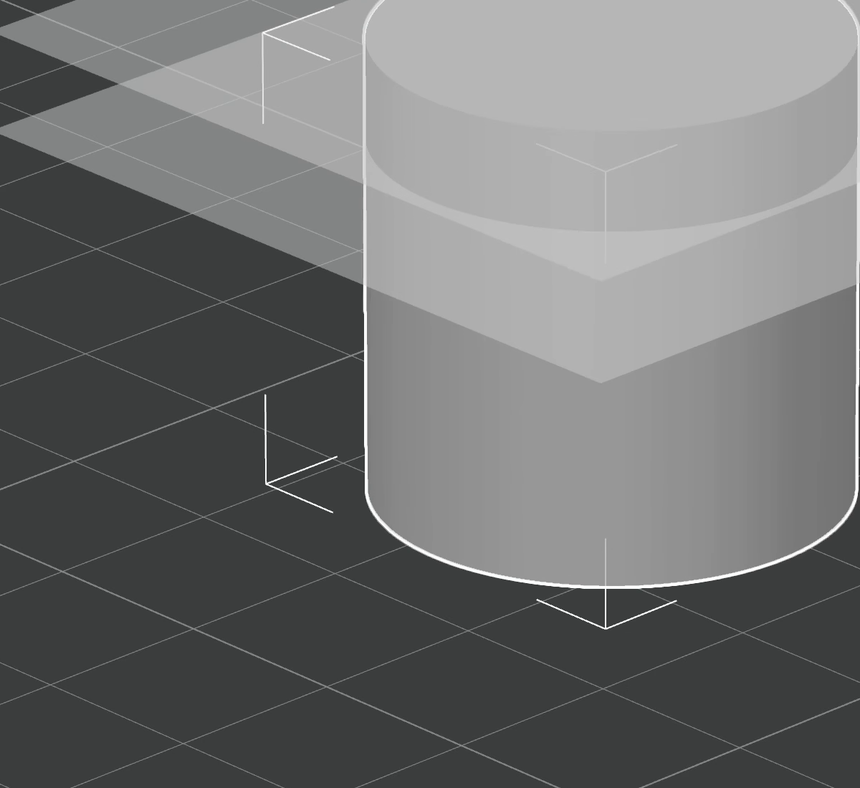
The modifier appears in the object list as a child of the object, named for its shape, so a cube arrives as Generic-Cube. Select it there and resize and move it until it covers the region you want changed. Only the overlap counts: a modifier hanging in the air beside the model does nothing at all. With the modifier still selected, the property tabs underneath now belong to it rather than to the object, and everything in them is available. Here that is wall loops 4 and sparse infill 35%, the same two values as before, applied only to the bottom of the cylinder. One thing to watch from the moment a modifier is attached: the object is now a group, so click the individual part in the object list before you move or scale it, or you will transform the whole thing.
Slice, and look at the boundary
Step through the layers and you can watch it happen: 15% infill and 2 walls up to the top of the modifier, 35% and 4 walls below it. The result is 59m19s and 49.08g. Against the baseline that is 10 extra minutes and 13 extra grams, where doing it across the whole model cost 29 minutes and 36 grams. Same reinforcement where it matters, about a third of the price. This is also the shape of the useful version of this job. If something you printed broke, put a modifier over the part that broke rather than raising infill everywhere and reprinting a stronger version of the bits that were already fine.
The same shape trick does color and inlays
A modifier can carry a color as easily as it carries a wall count, and that turns it into a way to color by shape rather than by painting. Drop a sphere on top of the cylinder, set the modifier's color, and only the overlapping cap changes. Run a bar straight through the middle instead and the band appears on both sides, which is the interesting one: that is an inlay, and you did not model a pocket for it. Because Load and SVG are on the same menu, the shape does not have to be a primitive. A heart, a monogram, an extruded logo, anything you can load becomes the region. The text tool works the same way, and its operation toggles at the bottom of the dialog let you set text as a part, a cut, or a modifier, so you can change print properties inside the letter shapes themselves.
Fuzzy skin only where you actually hold it
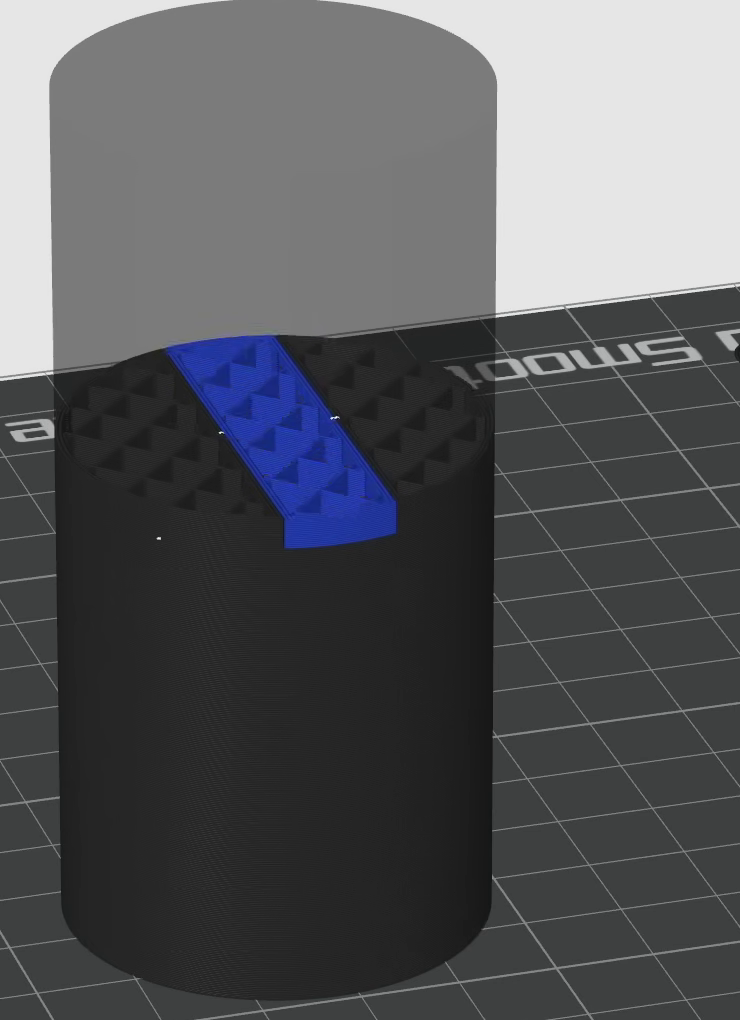
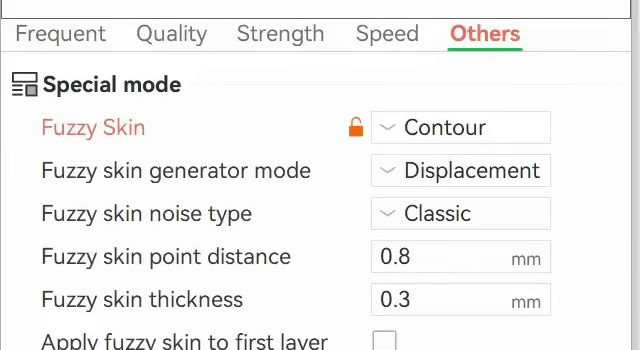
This is the one worth knowing about even if you never need localized strength. Put a cube modifier over the grip section of a door handle, go to the modifier's Others tab, and set Fuzzy Skin to Contour under Special mode. Slice and the grip comes out textured while the rest of the handle stays smooth. That is knurling you did not have to model, on the only part of the object that wanted it. Leave the other fuzzy skin values alone unless you have a reason: generator mode Displacement, noise Classic, point distance 0.8mm and thickness 0.3mm are the defaults and Contour is the only thing changed here.
Use a height range when the area is a band, not a shape
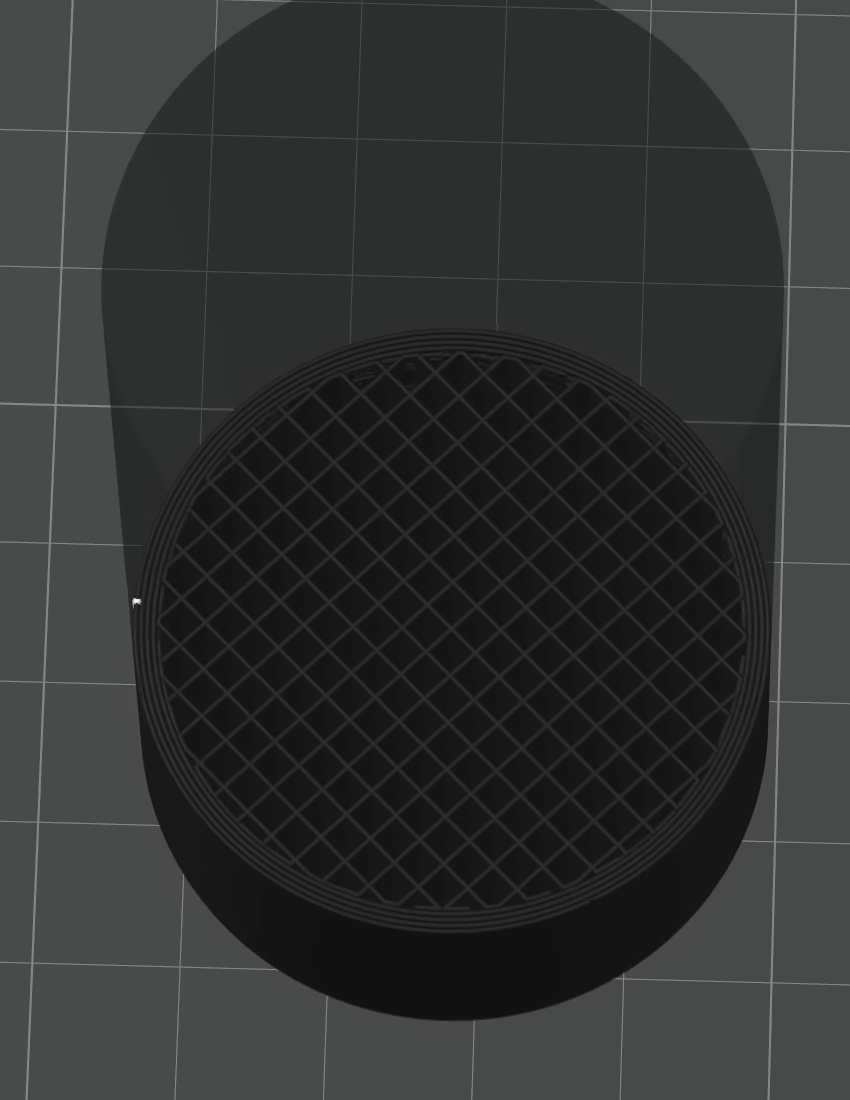
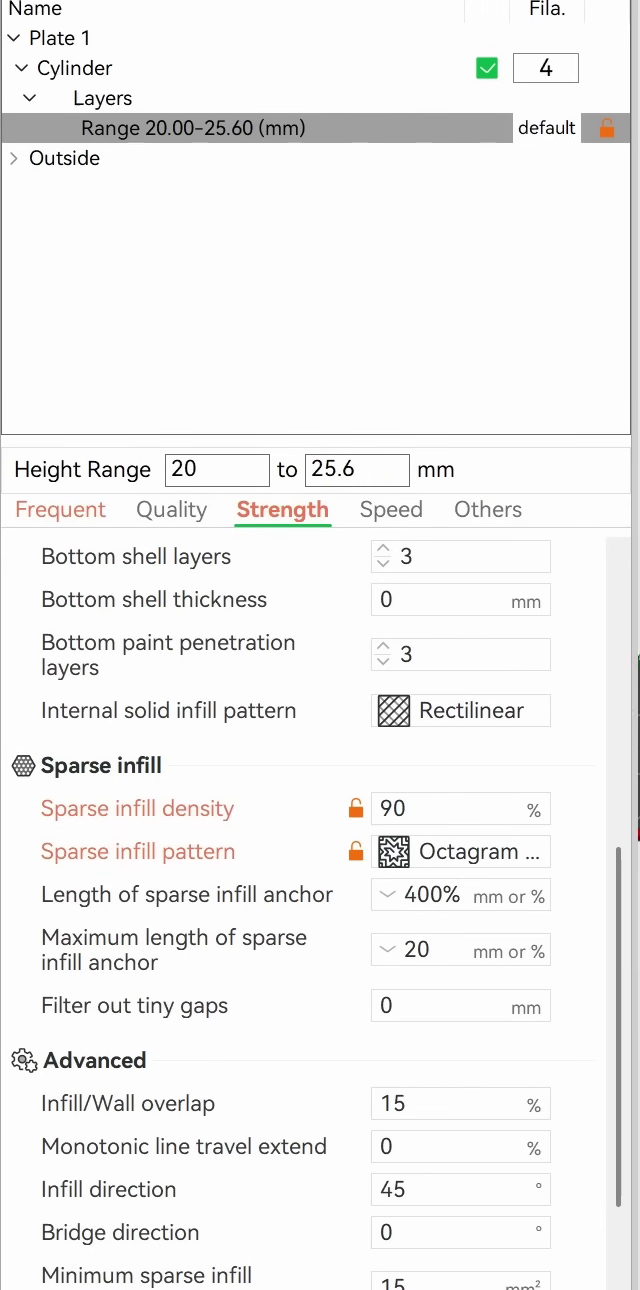
Sometimes what you want to change is every layer between two heights, all the way across the model, and pushing a box through it to do that is silly. Height range Modifier is on the same right click menu and works the way paint by layer does. It arrives under a Layers group in the object list with a default range of 0.00 to 2.00mm, and you type the start and end you want. This cylinder is 25.6mm tall so the range goes 20 to 25.6 to catch the top section. Then set the properties as you would for any modifier: here sparse infill to 90% and the pattern to octagram, against the model's 15% grid, chosen to be obvious rather than because either number is a recommendation.
Slice and read the layers bar
The change lands exactly where you asked. Above 20mm the infill is the dense octagram, below it the original grid, and the layers bar on the right marks the layer and the height where it switches so you can check rather than assume. That readout is the fastest way to catch a range you fat-fingered, which is easier to do than it sounds because the object list updates while you are still typing the second number.
Where it goes wrong
You change the settings and the slice comes out identical
Why: The object was selected rather than the modifier, so the values went onto the whole model, or onto nothing useful. Bambu Studio warns about this when you add the modifier and the warning is easy to click past.
Fix: Select the modifier in the object list first, the child entry named for its shape. The property tabs underneath belong to whatever is highlighted there, and that is the only thing controlling which of the two you are editing.
Trying to move the modifier moves the whole object
Why: Attaching a modifier makes the object a group. Clicking it in the viewport selects the group, so every move, scale and rotate applies to all of it.
Fix: Pick the individual part out of the object list before transforming it. This catches people on boolean work in the same slicer for the same reason, so it is worth building the habit once.
The modifier has no effect on part of the region you wanted
Why: A modifier only applies where the shape physically intersects the mesh. It is easy to place one that looks right from above and is floating clear of the surface, or that stops short of the area you cared about.
Fix: Check it from a front or side view before slicing, and make the shape deliberately larger than the region rather than a tight fit. Overshooting into empty space costs nothing.
The height range covers the wrong layers
Why: The object list updates as you type, so it will show a partial range like 20.00 to 20.50 while you are still entering the second number. Glance at it mid-edit and you will believe the wrong thing.
Fix: Read the range off the object list after you have committed both fields, then confirm against the layers bar once you slice. The default range is 0.00 to 2.00, so a range that still starts at 0 usually means the first field never took.
You wanted a hole and got a settings change
Why: Add modifier and Add negative part sit next to each other on the same menu and both drop a shape onto your object. A modifier changes how the overlap prints; a negative part stops it printing.
Fix: Use a negative part to remove material. It is also the non-destructive way to cut, which means you can resize it later, unlike a mesh boolean.
What I would do differently
- Reach for a loaded model rather than the primitives. Load and SVG are right there on the menu, and an extruded monogram used as a modifier gives you an inlay with no pocket to model and no boolean to undo.
- Go back through prints that failed and put a modifier on the part that broke, instead of raising infill across the model and reprinting the areas that were already fine.
- Stop modeling knurling. A cube modifier with fuzzy skin set to contour does grip textures on the exact area you hold, and it takes about twenty seconds.
- Time the baseline first, every time. The whole argument for this feature is the gap between two slice estimates, and that gap is invisible if you never slice the cheap version.
Read next
- Getting sharp text on a 3D print in Bambu Studio
The most useful thing a modifier does, on the channel's most watched subject. Engraved text takes the improved settings by switching the text operation to Modifier, so the letters get tuned and the rest of the model does not.
- Is a 0.2mm nozzle worth it for small prints?
A real case for the strength trick. A 40mm miniature snapped at the ankles across every profile tried, including a paid one, and dropping infill to 12% is exactly the kind of global change a modifier should have been doing locally.