Bambu Lab A1, Fusion 360, Bambu Studio
Getting a glossy resin dome on a 3D printed keychain
The glossy domed top on a printed keychain, pendant or badge is not a coating technique. It is a modeling decision, and if you get that part wrong nothing you do with the resin afterwards will fix it. What holds the resin in place and lets it self level is a 1mm well, made by extruding the rim of the part 1mm higher than the middle. Everything else here exists to make that well printable without supports and to cure it without a tacky finish. There were two earlier attempts at this, and the mistakes in them are on the page too, because they are the parts that took the longest to work out.
What I used
The 200g bottle. It is a squeeze bottle, which is what you want for filling a small well without flooding it. It is the single product this project has ever earned a commission on, so treat that as a disclosure rather than as evidence it is the best one.
Mine came with a resin printer I no longer use. Easily the most expensive item here, and the flashlight below is not a substitute for it.
Mine is no longer sold, so this is an equivalent I have not used. A flashlight skins the surface in about a minute, enough to carry the parts. It does not cure them, so it is not a station replacement.
- Silicone mat
One that fits inside your curing station. This is the part that stops you spilling resin, and it matters more than it sounds. Sit the parts on the mat, fill them there, then carry the mat into the station rather than carrying the parts. No link for this one yet, and any mat that fits your platform will do.
- Sewing needle
For bubbles. A needle, specifically, not the point of a mechanical pencil and definitely not a flame. See the pitfalls.
Matte black for the body, which is what makes the clear dome read as depth rather than as a shiny coat on top of a shiny print. The logo colors were PLA Basic. This is a four color print, so you need an AMS or the patience for manual swaps.
Where to get a design as an SVG if you do not have one. The logo on this keychain belonged to the client who commissioned it, but the flags on the earlier version came from here.
Free for personal use. The one thing this method genuinely needs from your CAD tool is the ability to sketch on the face of a solid rather than on a plane, which is the trick in step 5.
Steps
Draw the body and offset a 1mm lip
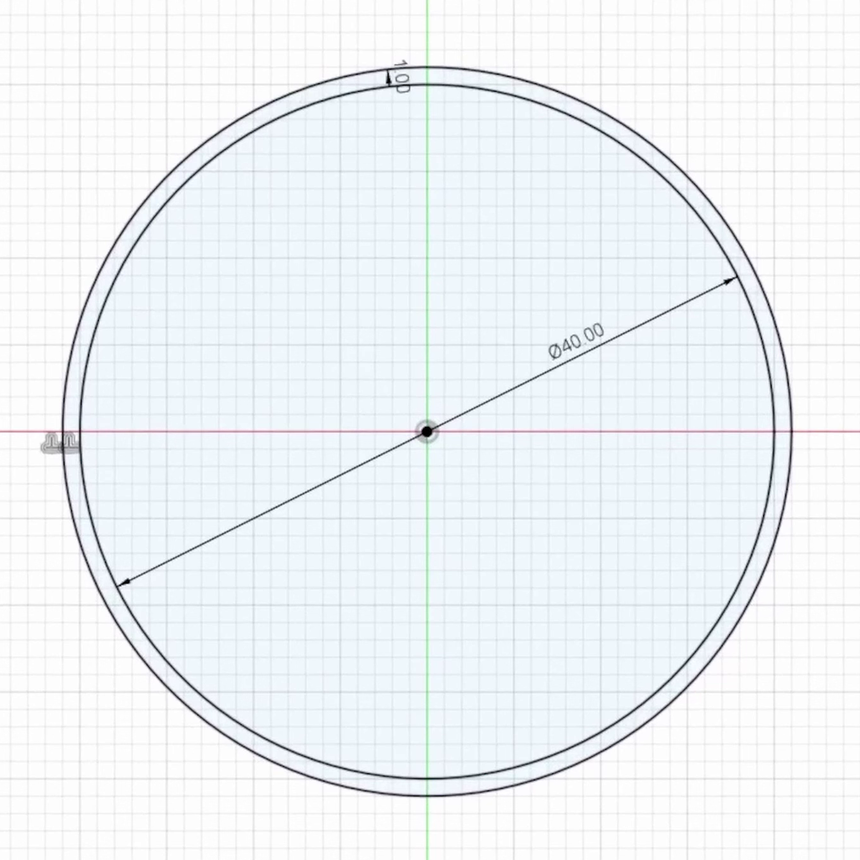
Sketch on the top plane and draw a circle 40mm across. The earlier flat keychains were 45mm and those were a little too large once they were on a keyring. Select the outside edge, choose Offset from the toolbar, and offset it 1mm outwards. That outer ring is the lip. Once the ring and the middle are extruded to different heights it becomes the well that holds the resin, and it is the reason the finished dome is possible at all. Worth knowing before you size a design to fit: the part comes out 42mm across, not 40, because the offset adds 1mm on each side.
Put the hanging hole through the keychain itself
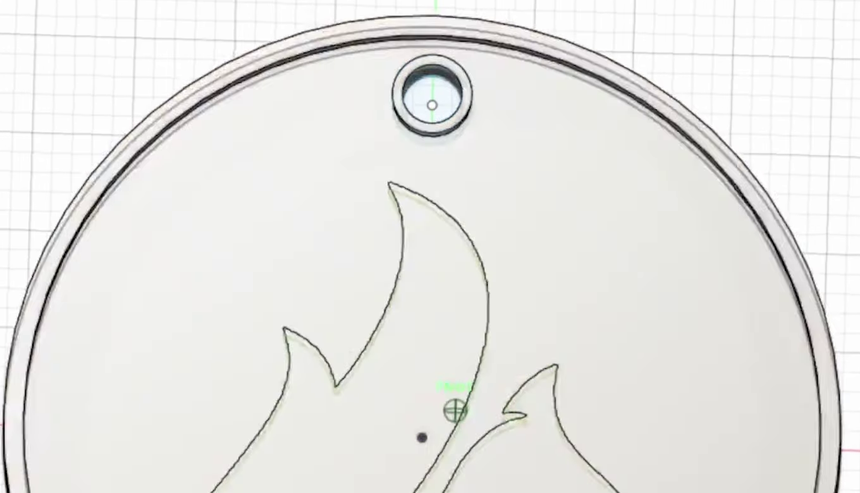
The loudest complaint about the previous version was the eye hooks. Glued into the edge of a flat keychain, the hook is the weak point and it will break if the keychain gets handled roughly, which is the only way a keychain ever gets handled. Put a 3mm hole through the body instead. The hole then needs a lip of its own, for exactly the same reason the outside edge does: without one, the resin you pour in drains straight back out through the hole. Select the hole edge, offset it 0.5mm, and you have a raised collar around it.
Insert the design and extrude to two heights
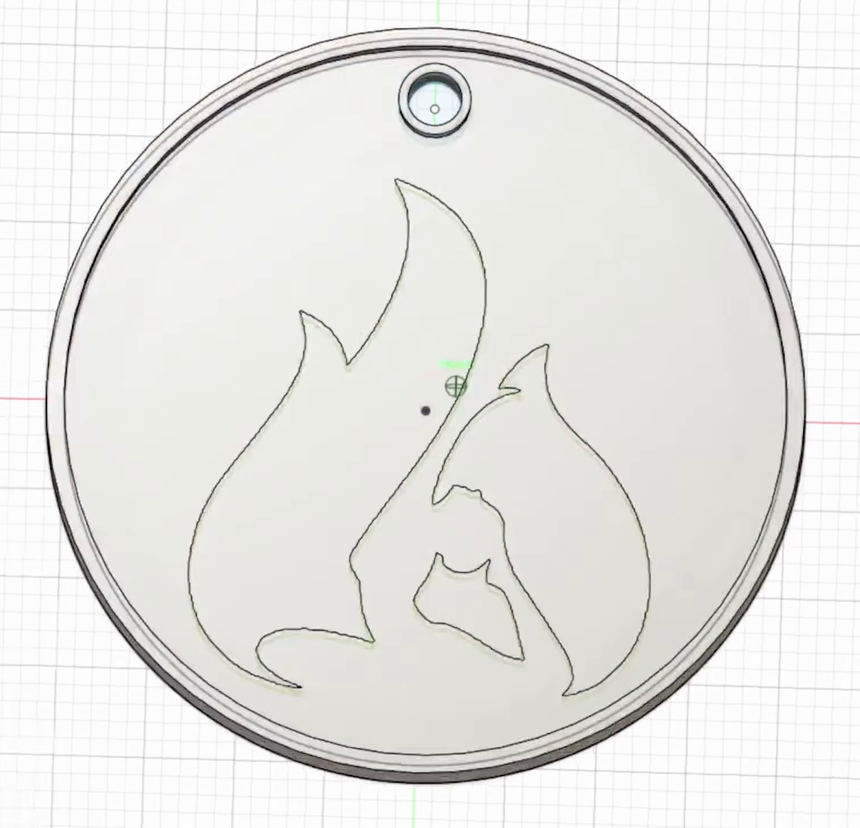
Insert, then SVG, then size the logo to sit inside the lip. Now extrude: the inside faces go 2mm, and both lips, the outer ring and the hole collar, go 3mm. That 1mm difference is the well. Extrude each region you want in a separate color as a new body, because that is what makes them separately paintable in the slicer later. Check the result over, then save and export. Keep the design simple at this size. Small lettering on a 42mm part is its own problem and not one this method solves.
I used: Vecteezy
Make a lipless copy, because the back has to be mirrored
This is the step that is easy to skip and impossible to fix afterwards. The design is extruded all the way through, so the same shapes appear on the back, and seen from behind they read mirrored. On a Canadian flag nobody notices. On a French or Italian flag it is simply wrong, and the same applies to any lettering, logo or asymmetric mark. The fix is to make the back half a mirror of the front, so each face reads correctly from its own side. Doing that naively puts the lip on the bottom as well as the top, and a lip facing down means supports underneath, which would ruin the surface that matters. So you need a second version of the part with no lip at all: a flat 2mm disc carrying the same design. Cut it in Fusion. Trying the same boolean in Bambu Studio ruined the model and it had to be redone in Fusion anyway.
Cut the lip off twice, with Keep Tools on for the first
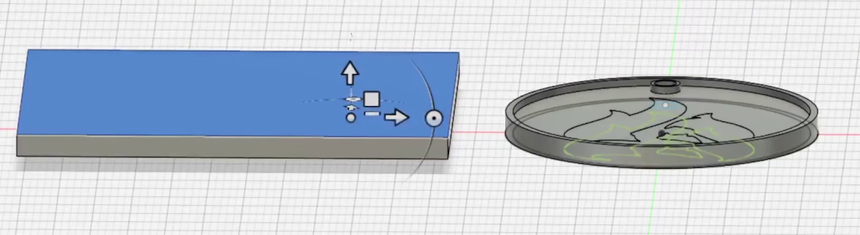
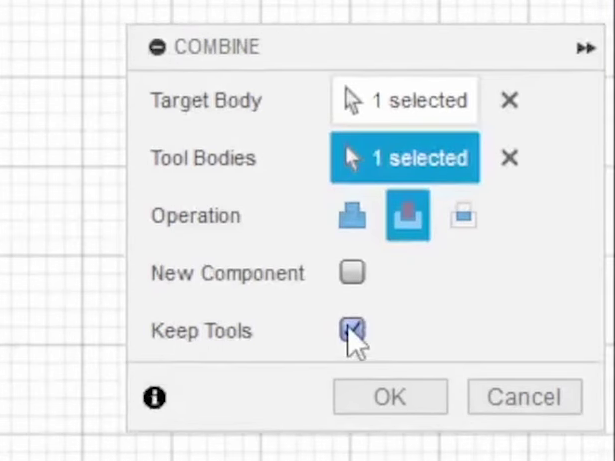
Start a new sketch, and when Fusion asks which plane, click the inside surface of the keychain rather than the top plane. That is the trick: the sketch lands 2mm up, level with the bottom of the well, so a block extruded from it removes the 1mm of lip standing above it and nothing else. Draw a rectangle large enough to cover the whole design, off to one side where you can see it, and extrude it at least 2mm. Move it over the keychain and check it covers everything. Then Combine. Selecting the bodies is fiddly because the rectangle is in the way, so hide it, pick the lip as the target body, unhide it, and pick it as the tool body. Set the operation to Cut, and tick Keep Tools, because you need the same rectangle again for the hole collar. Repeat for the collar with the same hide and unhide dance, and this time leave Keep Tools off. Export under a different name so you have both halves as separate files.
Color both halves, merge, and flip the bottom
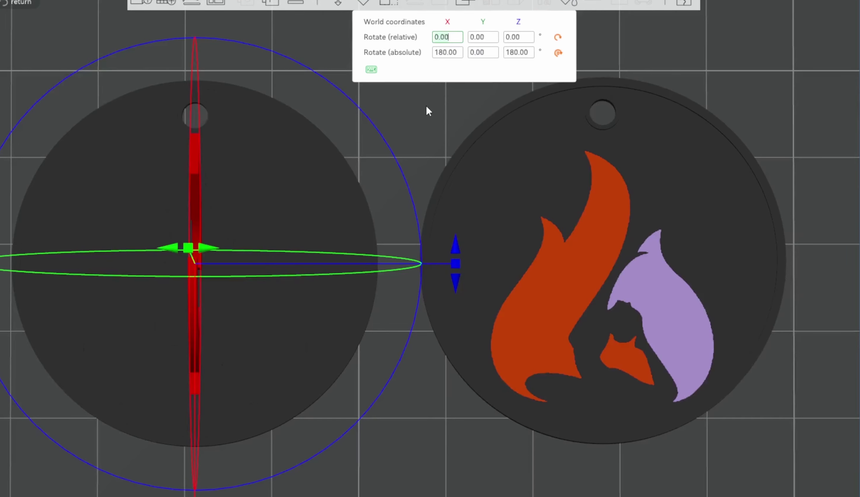
Import both files into Bambu Studio. Set the underlying filament colors first so the base color of each part is right on screen, then use paint to assign colors to the logo elements. Doing it in that order matters only for your own sanity, but painting a four color design against wrong base colors is genuinely hard to read. Select both parts and merge them as one object. Then rotate the flat lipless half 180 degrees so it faces downwards, which is what puts the mirrored face outwards. Its absolute rotation ends at 180 on X and 180 on Z once it is aligned with the top half.
I used: Bambu Lab PLA Matte
Raise the top half 2mm and center both
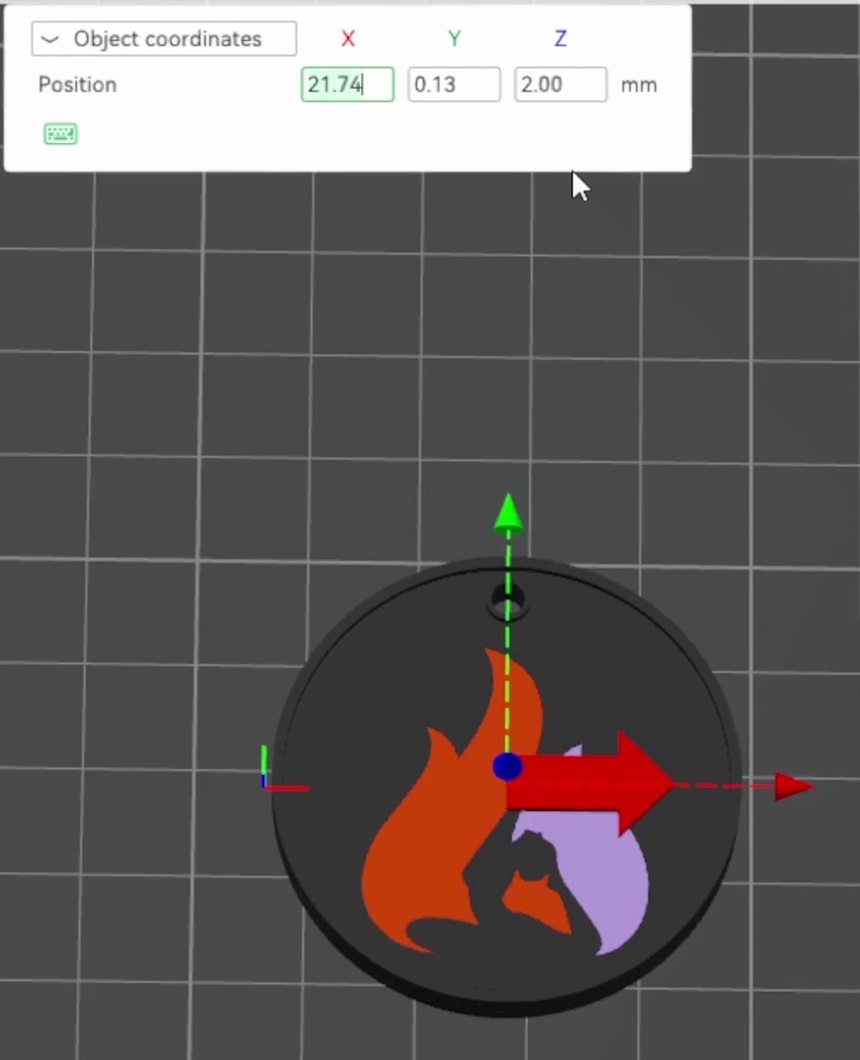
Center the two parts on each other, then move the lipped top half 2mm up the Z axis. The bottom half is 2mm thick, so that lands the top directly on it with no gap and no overlap, and the pair slices as one 5mm object with the well on the upper face. Check the object size while you are here. It should read 42mm across and 3mm tall for the top half, and if it does not then something went wrong with the offset back in step 1.
Iron the top surface and switch the wall generator
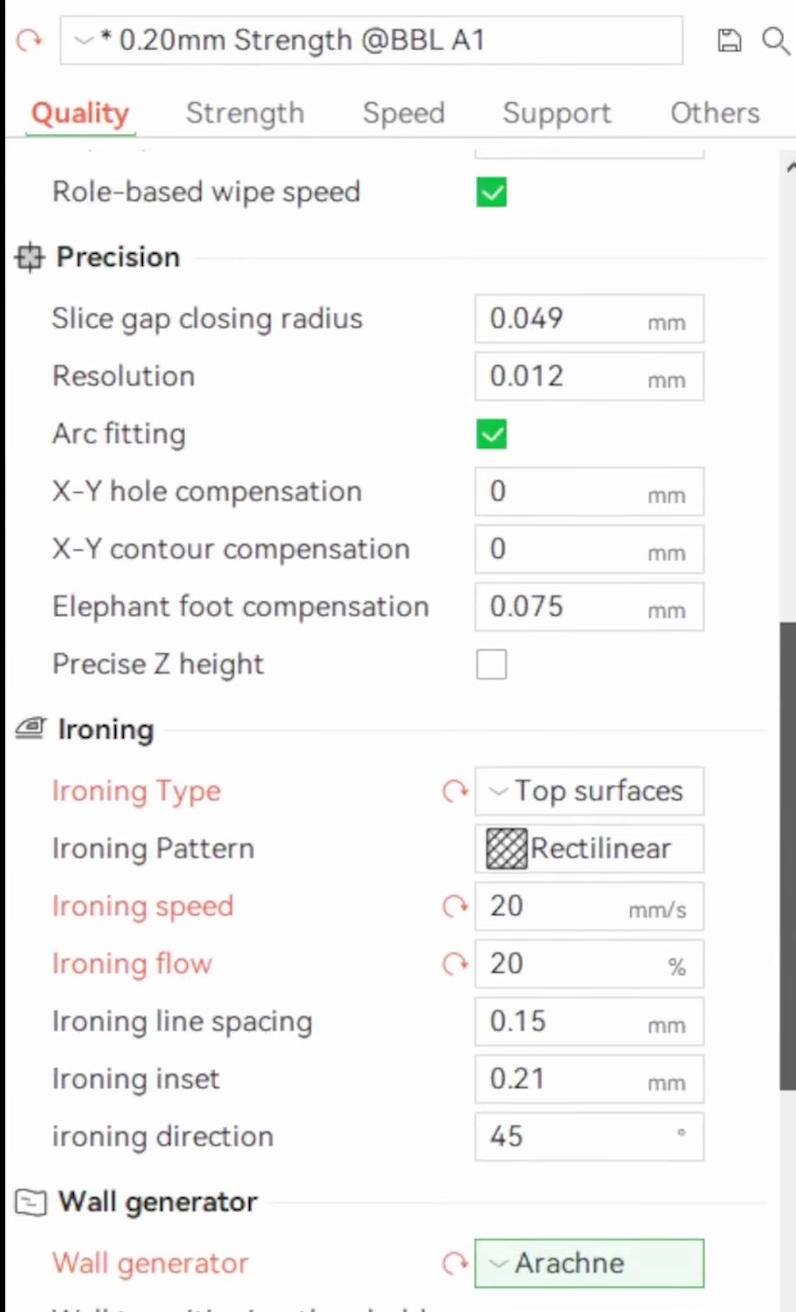
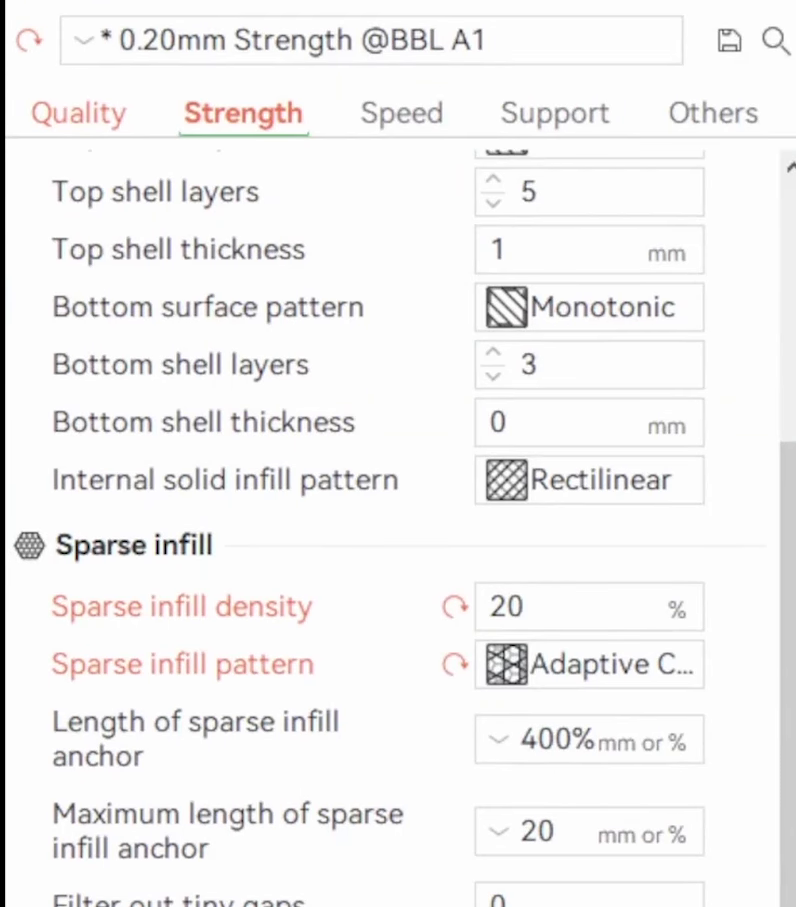
Starting from 0.20mm Strength for the A1, three changes. Turn ironing on for top surfaces at 20mm/s and 20% flow, which is what flattens the floor of the well so the resin sits on something smooth instead of on visible extrusion lines. Those two numbers came from printing test strips and picking what looked best, so print your own strips rather than trusting them. Then set the wall generator to Arachne, which handles the varying width around the lip and the hole collar better than the classic generator. The back of the part needs nothing, because it sits on the textured plate and comes out smooth on its own.
Set the infill, and look at what the color is costing
Sparse infill to adaptive cubic at 20%. Then read the slice figures before you press print, because on a small multicolor part they are worth seeing: one keychain came out at 12.60g of filament total, of which only 4.61g is actually the keychain. The other 7.99g goes into purge and the wipe tower across 19 filament changes. That waste is close to fixed per plate rather than per part, since the changes happen once per layer no matter how many keychains sit at that height. So print a plateful. This one was cloned to a dozen, and the tower it needs is much the same tower one keychain needed.
Flood the well, on something you can carry
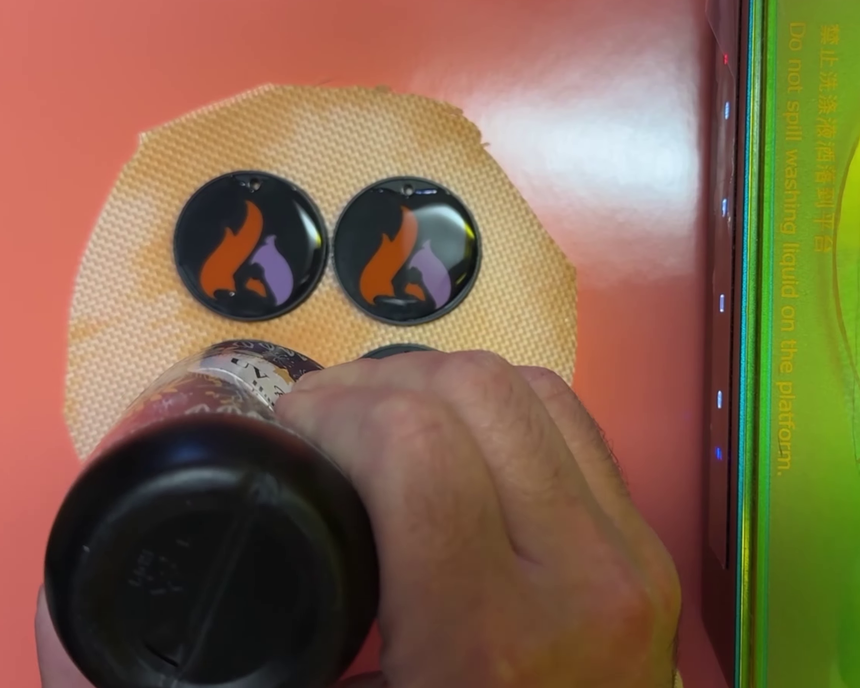
Sit the parts on the silicone mat first, inside or beside the curing station, and fill them where they are going to stay. Squeeze resin into the well until it stands slightly proud of the lip, because surface tension is what gives you the dome and a level fill gives you a flat top. Then stop, and do not chase the last corner: overfilling means it runs over the lip and down the side. The reason for the mat is the mistake it prevents. On the first attempt the filled parts could not be moved to the station without spilling, which meant curing them where they stood with a flashlight just to skin them over enough to carry. Fill them on something you can pick up and that problem disappears.
I used: OSBANG Crystal Clear Hard UV Resin, Silicone mat
Take the bubbles out with a needle, not a flame
Bubbles will be sitting in the resin and they cure in place, so deal with them now. A sewing needle picks them out cleanly, and it is the right tool rather than the nearest one. The nearest one on the first attempt was the point of a mechanical pencil, which works but is clumsy at this scale. The conventional advice is to pass a flame over the surface, and that is where the previous attempt went properly wrong. See the pitfalls before you reach for a lighter.
I used: Sewing needle
Cure four minutes, then four minutes again
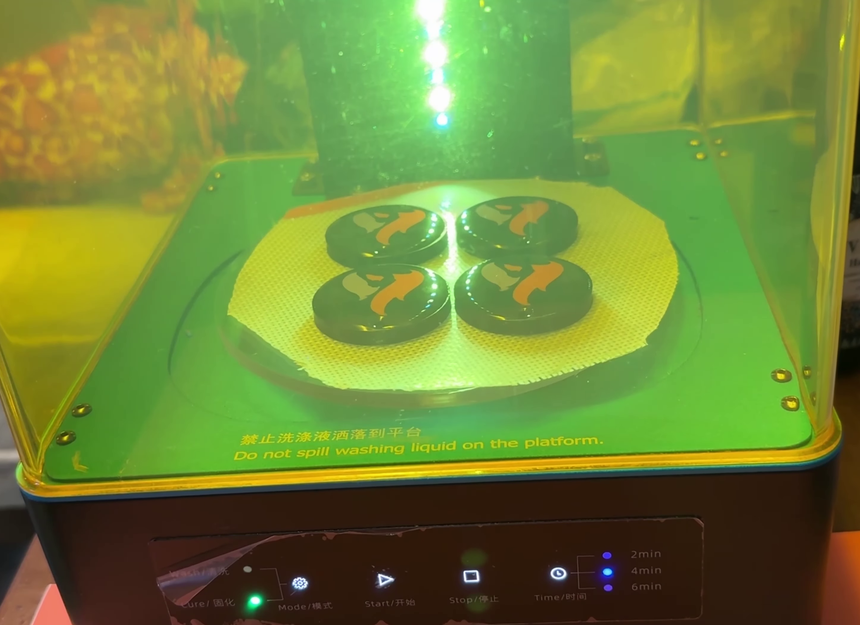
Carry the mat into the station and run it for four minutes. Then run it for another four. One four minute cycle leaves the surface tacky, and the second is what hardens it off and gets rid of that feel. This is not a case of eight minutes being some tuned figure: the station only offers 2, 4 and 6 minute settings, so four twice is how you get to eight. Work in batches of whatever your platform holds. Four at a time here, so a dozen keychains was three rounds.
I used: Anycubic Wash and Cure station
Where it goes wrong
The resin runs off the edge and dries as a thin patchy film with no shine
Why: The top of the part is flat. Nothing is holding the resin, so most of it leaves before it cures and what stays behind follows the print surface rather than levelling.
Fix: This is a modeling problem and there is no way to pour your way out of it. Go back and give the part a lip: offset the outer edge 1mm and extrude it 1mm higher than the middle. The dome comes from the well, not from the resin.
Resin keeps draining out through the hanging hole
Why: The hole is a through hole in the middle of the well, so it is a drain. Getting the outer lip right does nothing about it.
Fix: Offset the hole edge 0.5mm and extrude that collar to the same height as the outer lip. Every opening inside the well needs its own raised edge.
The parts are still tacky after curing and never seem to harden
Why: One four minute cycle is not enough for a well this deep. It is easy to read the tackiness as the wrong resin or a dud UV lamp.
Fix: Run the cycle again. Four minutes twice was reliably enough here, on the first attempt and on the second. If your station has a 6 minute setting, running 4 twice still beat one longer pass.
The finished part looks right from the front and reads backwards from the back
Why: The design is extruded through the full thickness, so the reverse face shows the same shapes mirrored. It is invisible while modeling, and invisible in the slicer preview if you only ever look at the front. Nobody caught it on the previous version until the parts were in hand.
Fix: Build the back as a separate lipless half carrying the mirrored design, and stack it under the lipped top. Turn the part over in the slicer preview before you print anything double sided, and turn a test print over before you make a dozen.
Booleaning the lip off inside Bambu Studio destroys the model
Why: The slicer's boolean is not the right tool for this cut, and the result here was a ruined model that had to be redone in CAD.
Fix: Do the cut in Fusion. Sketch on the inside surface of the keychain so the profile lands 2mm above the top plane, extrude a block at least 2mm through it, and Combine as a cut. Tick Keep Tools so you can reuse the block for the hole collar.
You are about to pass a flame over the resin to clear the bubbles
Why: It is standard advice for casting resin and it does not transfer to a small UV resin fill. Trying it with a long lighter on the first attempt did nothing to the bubbles and produced fumes bad enough to stop immediately.
Fix: Use a needle. Several people pointed out afterwards that a torch, not a lighter, is the tool that advice means, which is fair, but a needle solves the actual problem at this scale with no fire involved.
Eye hooks snap off the finished keychains
Why: A hook glued into the edge of a flat keychain is a small joint carrying all the load, and keys get handled roughly.
Fix: Do not use one. Put a 3mm hole through the body of the part and put the ring through that. It costs one sketch and one offset and removes the failure entirely.
What I would do differently
- Print the full plate from the start. Nearly two thirds of the filament on a single keychain slice went into purge and the wipe tower, and that cost barely moves when you clone the part, so one keychain is by far the most expensive way to make one.
- Try the same well on a coaster. Printed coasters come out with a slick surface that glasses slide on, and cured resin has a more rubbery feel, so the resin top would be doing something useful rather than only looking good.
- Find out whether a UV flashlight alone will fully cure a 1mm well, rather than only skinning it. The curing station is the expensive part of this whole method and it is the one thing that would put it out of reach for most people.
- Work out how to get small lettering to survive at this size. A logo on a 42mm part is fine, words are not, and the answer to that is a different job from anything on this page.
Read next
- Print by object in Bambu Studio
One keychain here needs 19 filament changes, and most of its filament goes into purge rather than the part. This is the setting that cuts those changes, on a plate that went from 41 down to 6.